Overview
Artificial intelligence covers everything related to making machines smart or intelligent. Whether it’s a robot, a refrigerator, a car, or a software application, if you are making them intelligent, then it’s AI. Machine Learning is commonly used alongside AI but they are not the same thing. ML refers to systems that can learn by themselves, and that get smarter and smarter over time without human intervention.

How do machines learn?
We saw how humans learn. But how do machines learn? Is it the same as humans or is it any different? Let’s have a look. Machine learning is the process of machines learning how to act by themselves without any human intervention. It is basically getting a computer to perform a task without explicitly being programmed to do so.
Machine learning life cycle
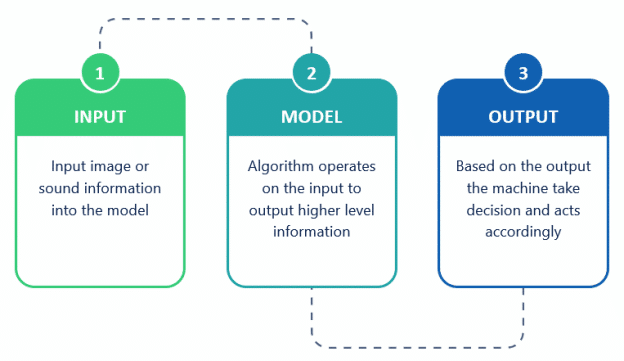
Let us explore the process of making a machine-learning model that identifies cats and dogs from images:
Step 1: Define Project/Objective
Step 2: Explore and Acquire Training Data
Step 3: Model Training
Step 4: Deploy the Model
In today’s world of technology, Machine Learning is used in many fields i.e., surveillance, healthcare, defense, gaming, and much more. Hence, we will also make a script in PictoBlox based on the machine learning model that detects the face using the camera and reports whether the person has a face mask covering his nose and mouth or not.
Activity 1: Hand Pose Detection
Let’s Code!
- Open PictoBlox and open the downloaded project. The environment of the project is already set for us to code. To access the ML Environment, select the “Open ML Environment” option under the “Files” tab.
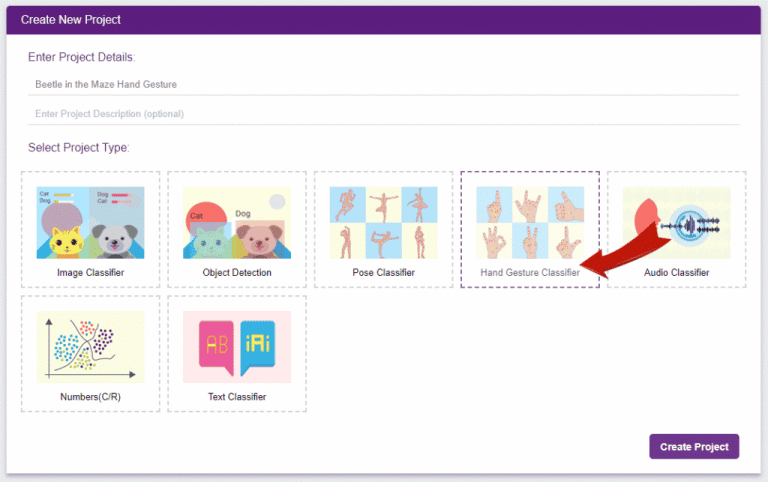
You’ll be greeted with the new screen. Click on “Create New Project“. - A window will open. Type in a project name of your choice and select the “Hand Gesture Classifier”. Click the “Create Project” button to open the Hand Gesture Classifier window.

- You shall see the Hand Gesture Classifier workflow with two classes already made for you. Your environment is all set. Now it’s time to upload the data.
- Create 5 classes “Forward”, “Backward”, “Left”, ”Right” and “Stop”.
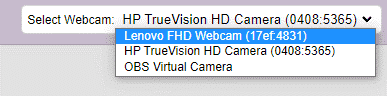
- Next, click on the “Hold to Record” button to capture samples for the classes. If you want to change your camera feed, you can do it from the webcam selector in the top right corner. Take 100+ hand gestures with different hand positions.

- Repeat the above step and give samples for all 5 classes in the following method.
- The face of the palm is set to “Forward”.
- The back of the palm is set to “Backward”.
- The palm tilted towards the left is set to “Left”.
- The palm tilted towards the right is set to “Right”.
- The closed fist is set to “Stop”.


Now let’s train the model by clicking on “Train Model” button. Test the model by either using the device’s camera or by uploading an image from the device’s storage. 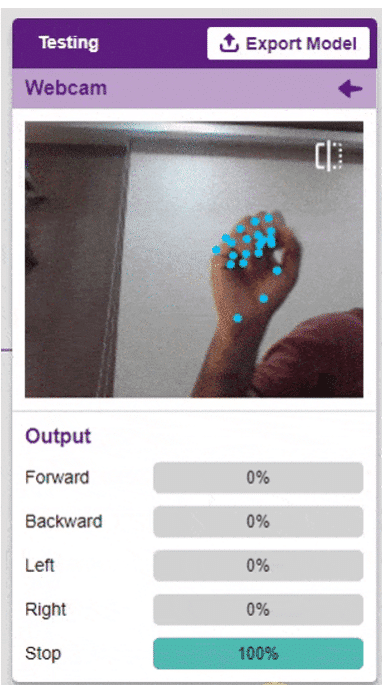
Activity 2: Make Beetle in the Maze with Pose Detection
Let’s strat from the end of the previous activity:
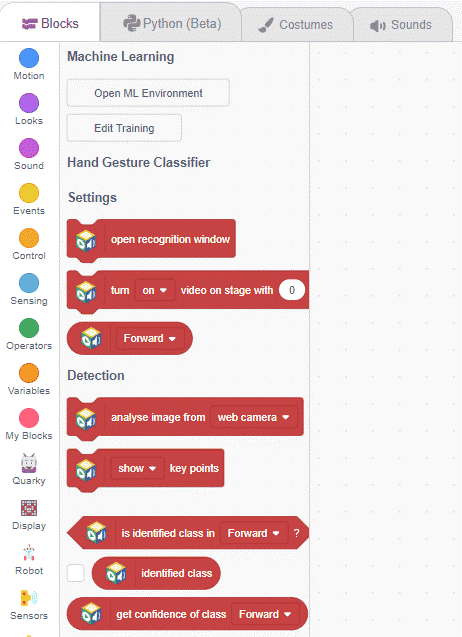
- Click on the “Export Model” button on the top right of the Testing box, and PictoBlox will load your model into the Block Coding Environment.

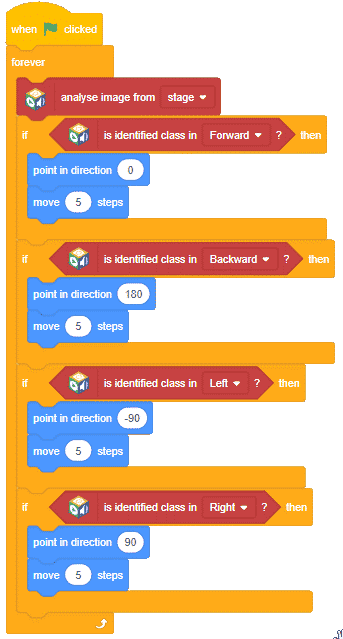
- The script in the Block Coding is all set for you.

- Add the is identified class () block from the ML Environment extension in the if condition and set the appropriate direction.
- Add the analyse image from () block from the ML Environment extension and select stage as the option.
- Click on the Green flag to start the execution. Control the Beetle using your Hand gestures and have fun!